
Tiger's Nest Hike: What to Expect, How Hard It Is, and Why It's Worth Every Step
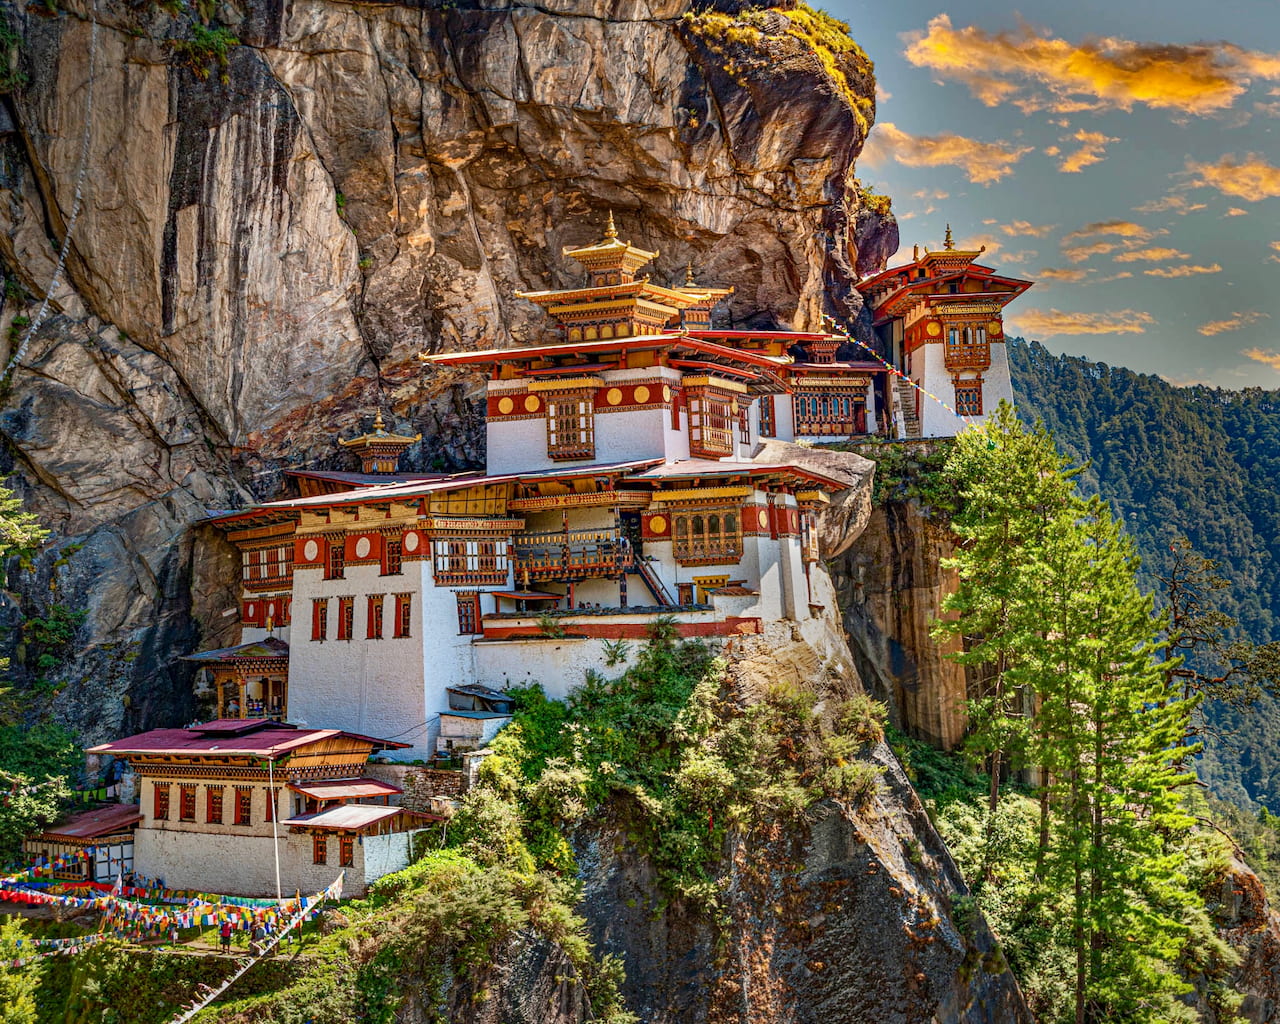
The Tiger's Nest hike is one of the most talked-about walks in Asia, and the first time you see the monastery, you see it from the side.
You've been walking uphill through pine forest for a couple of hours, and then the trail opens up and there it is — the monastery clinging to the cliff face about 900 metres above the valley floor, half-swallowed in cloud and mist on a good morning. It doesn't look real. It looks like someone described a monastery to an architect and said "make it impossible."
That first sighting is what most people photograph. But the hike itself, and what you feel when you finally reach the monastery, is what most people don't write about properly. This is the honest guide to the Tiger's Nest hike — what it's actually like, how hard it is, how long it takes, and the details that make it one of the most worthwhile mornings you can spend in Bhutan.
What Tiger's Nest Actually Is
Tiger's Nest (Paro Taktsang in Dzongkha) is a Buddhist monastery complex built into a cliff at 3,120 metres above sea level, in the Paro valley of western Bhutan. The main temple was built in 1692, though the site is considered sacred going back much further, to the 8th century when Guru Rinpoche is said to have flown to this cliff on the back of a tigress and meditated in a cave there for three months.
It's the most recognisable image in Bhutanese tourism and, unlike a lot of famous sites, it genuinely earns the attention. The monastery is still an active religious site. Monks live and pray there.
The Tiger's Nest Hike: Basic Stats
Before anything else, here are the numbers.
| Detail | Info |
|---|---|
| Starting point | Paro Taktsang trailhead car park |
| Distance (one way) | Approximately 4.5 km |
| Elevation gain | Around 900 metres |
| Time to reach the top | 2 to 4 hours depending on pace |
| Total round trip | 4 to 6 hours including time at the monastery |
| Altitude at the top | 3,120 metres above sea level |
| Trail surface | Mix of dirt path, stone steps, and paved sections |
There's also a cafeteria about halfway up where you can stop for tea, coffee, and snacks. It has a terrace with a direct view across to Tiger's Nest. Most people stop here.
How Difficult Is the Tiger's Nest Hike?
Honestly, it's not that hard. That's worth saying clearly, because a lot of people arrive anxious about it and leave thinking they'd overcomplicated it in their head.
The trail is well-maintained and clearly marked the whole way. It's a sustained uphill walk, not a technical climb. There are no scrambles, no exposed ridges, no sections that require anything more than walking carefully. The steepest part comes near the top, where you descend a long stone staircase to the waterfall and then climb back up the other side to reach the monastery entrance. That section is the most physically demanding and the most memorable.
If you walk regularly, you'll find this manageable. If you're not particularly active but you're willing to take it slowly and stop when you need to, you'll still get there. There are horses available on the lower section of the trail for those who need them. Ask your guide about this in advance.
Two genuine considerations. First, altitude. At over 3,000 metres, some people feel the elevation, especially if you've only just arrived in Bhutan. The air is thinner than it feels on flat ground. Take it at your own pace and don't rush. Second, the stairs near the top are steep going down and steep going back up. Your legs will feel it. Neither of these is a reason not to do it. They're just things to know before you start.
Go Early. This Matters More Than You Think.
Start the Tiger's Nest hike before 8am if you can arrange it. Two reasons.
First, temperature. Bhutan's Paro valley heats up as the morning progresses, and the trail is exposed in sections. Leaving early means you do most of the climb in the cool of the morning. By the time you're descending, it'll have warmed up considerably, which is fine when you're heading downhill.
Second, and more importantly: the mist. In the early morning, particularly in spring and autumn, Paro valley holds a low cloud that sits around the upper third of the trail and the monastery itself. When you reach the top, the monastery appears and disappears through the mist. The light is soft. It's quieter. The atmosphere at that altitude, with the cloud moving through the pine trees and the monastery half-revealed above you, is something that photographs don't capture properly. It has to be felt.
By 10am, most of that has burned off. You'll still have the monastery, but you'll also have the full heat of the day and the main rush of tour groups arriving. Go early and you'll have the better version of this experience.
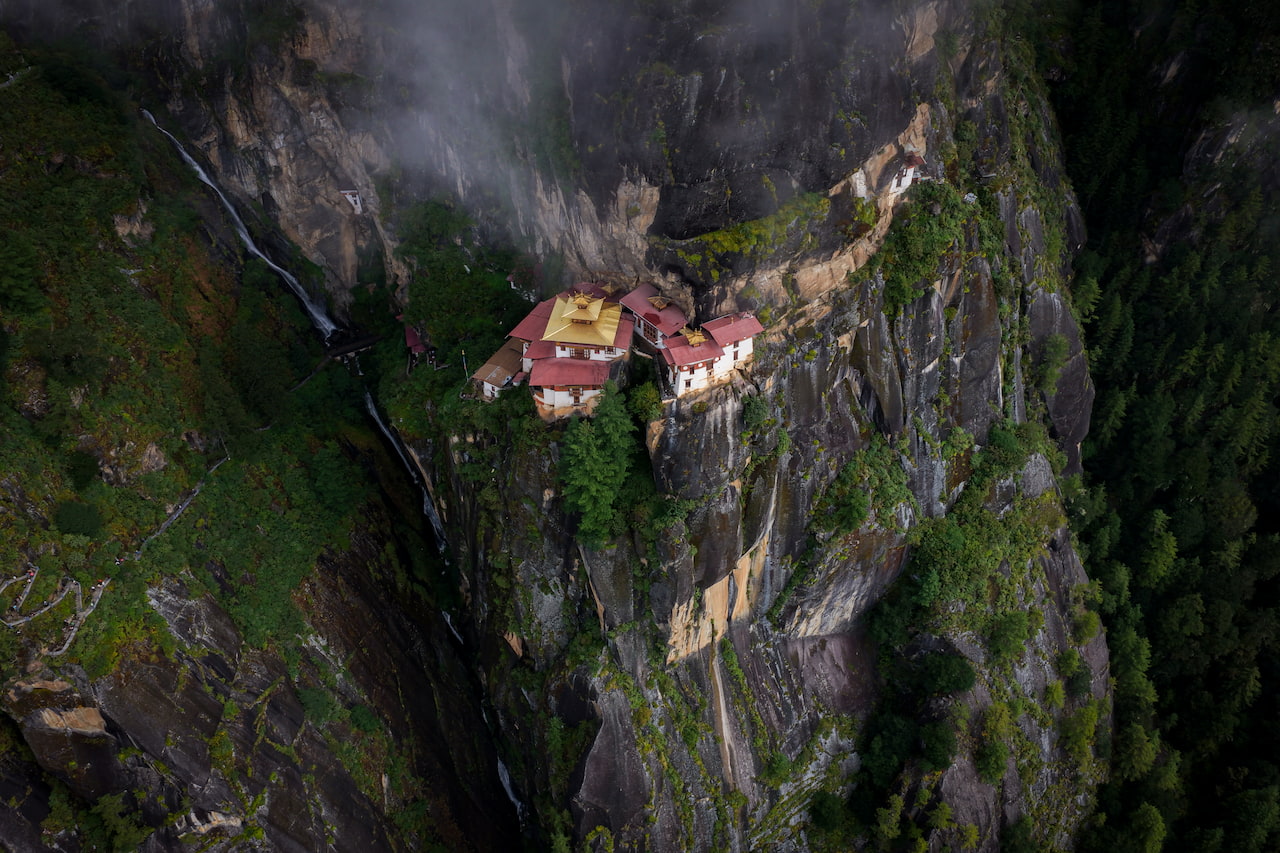
The scale only makes sense from above. That's 900 metres of elevation gain between the valley floor and the monastery walls.
What the Trail Is Actually Like
The hike starts from a car park at the base of the valley. Your guide will have arranged the entry permits. From the trailhead, the first section winds uphill through pine and rhododendron forest. The path is clear and well-worn. This section is steady but not punishing. Most people find a comfortable pace here quickly.
About halfway up, you reach the cafeteria. Stop here. Get a tea or a butter coffee, sit on the terrace, and look across at Tiger's Nest from this vantage point. This is where most of the famous photos are taken, the monastery sitting on the cliff directly opposite, close enough now to see the detail of the white walls and the golden roofs. Spend fifteen minutes here. You've earned it.
After the cafeteria the trail continues upward, more steeply. The vegetation thins out. You start to feel the altitude more. The monastery is above you but no longer visible — you're too close to see the full picture now. This section is where pace matters. Short steps, steady breathing, no rushing.
Then you reach the top of the ridge and the trail drops sharply downward. This is the descent to the waterfall.
The Waterfall, the Descent, and Entering the Monastery
This is the part people don't write about enough.
When you start descending toward the monastery entrance, something shifts. The trail narrows, the stone steps are worn smooth, and below you can hear the waterfall before you can see it. Then you turn a corner and it's there — a tall, powerful waterfall dropping directly beside the path, the water rushing past the stone walls of the monastery entrance. The sound fills everything.
It's one of those moments that stops you. Something almost ceremonial about it, like passing through a threshold. You've climbed for two hours through forest and cloud, and now this waterfall is washing the world away before you go inside.
Whether you're religious or not, it registers as something more than just water on rock. After the waterfall you climb the final flight of stairs to the entrance gate, remove your shoes and step inside.
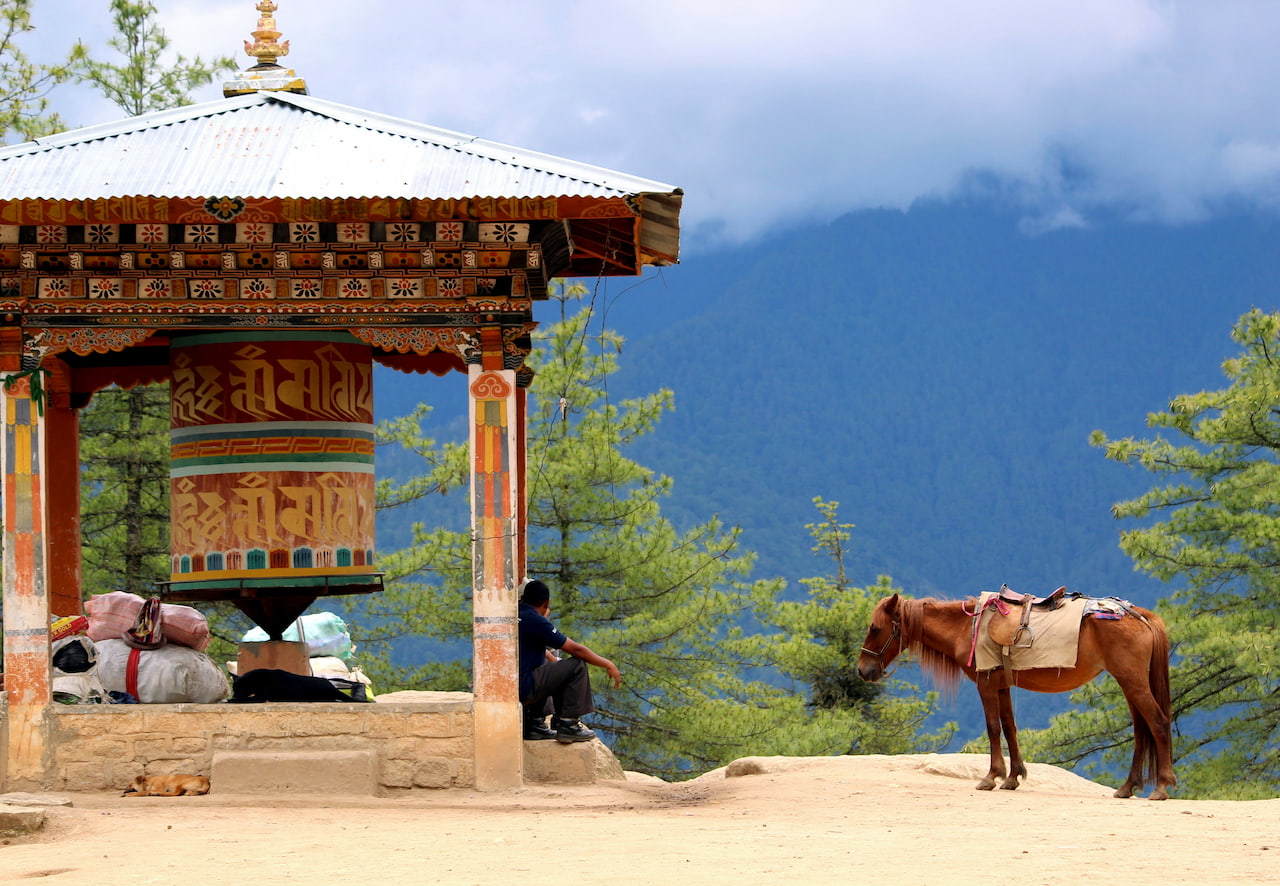
Halfway up the trail the monastery comes into full view for the first time. This is the moment most people stop walking and just look.
Inside the Monastery
Tiger's Nest isn't a single room. It's a complex of several temple chambers built across and into the cliff face, connected by steep internal staircases and narrow passageways. Your guide will take you through the main rooms, each one small, dark, and filled with butter lamps, thangka paintings, and the smell of incense that has been burning there for centuries.
The cave of Guru Rinpoche is the most sacred chamber, the original meditation site. It's low-ceilinged, lit by dozens of small flames. Monks may be praying. This is not a place to rush through or treat as a photo opportunity. Take it in slowly.
You'll move from room to room, descending and ascending through the cliff. At certain points you step outside onto small terraces with a direct drop down to the valley far below. The exposure is real, the monastery is genuinely hanging on the side of a cliff, but the terraces have railings and are safe. Stand there for a moment. Look down at Paro valley spread out below you and at the trail you walked up through the trees. It reads differently from up here.
Photography inside the monastery is not permitted. Respect this without exception. Allow 45 minutes to an hour inside, minimum.
Practical Tips for the Tiger's Nest Hike
What to bring
- 1.5 to 2 litres of water per person — there's nowhere to refill on the upper trail
- Snacks — the cafeteria has food but it's basic
- Layers — it's cooler at altitude than at the base, especially early morning
- Sunscreen and a hat for the exposed sections
- Trekking poles if you use them — they help significantly on the descent
What to wear
- Comfortable walking shoes with grip — trainers work, trail shoes are better
- Covered shoulders and knees for monastery entry — this is required, not optional
- Light, breathable layers you can remove as the day warms up
- No selfie sticks or drones — neither are permitted in this area
Best Time to Do the Tiger's Nest Hike
The best months are March to May and September to November. October and November give you crisp, clear skies and the best chance of that early morning mist. In spring, the rhododendrons on the lower trail are in bloom, which adds something to the walk up. For a full month-by-month breakdown, see our guide on the best time to visit Bhutan.
Avoid midday in peak season if possible. The trail gets busy between 9am and 2pm. Going early solves this entirely.
Getting to the Tiger's Nest Trailhead
Tiger's Nest is in the Paro valley, about 10 kilometres from Paro town. Your guide and driver will take you directly from your accommodation. The drive to the trailhead takes roughly 20 minutes from central Paro.
Entry to the trail requires a permit, which is included in your Bhutan Sustainable Development Fee and arranged through your tour operator. You won't need to sort this yourself. For official permit information, the Tourism Council of Bhutan is the authoritative reference.
Is the Tiger's Nest Hike Worth It?
Yes, and it's not even close.
Tiger's Nest is one of those places that has been photographed so extensively it risks feeling overfamiliar before you arrive. The hike, the waterfall, the monastery rooms in the cliff, the view back down the valley — none of it is diminished by having seen it in photos. If anything, the photos underrepresent it, because they can't carry the atmosphere, the altitude, the cold air, or the sound of the waterfall.
It's worth planning your whole Bhutan itinerary around it. Most people do.
Planning Your Bhutan Trip?
We design private Bhutan itineraries that put Tiger's Nest in the right place — not squeezed in as an afterthought, but properly paced so you arrive fresh and leave with time to absorb it.
Get in Touch